Shipping Report

 
In this section, you will learn how to print a tracking shipping report:


Printing Shipping Report
 
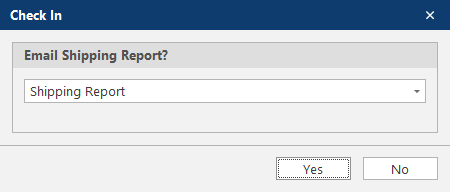
1. When an asset is checked in or out, the print shipping report dialog box will appear.  You can also print previous shipping labels by clicking on Print Preview Report
 
 
2. Select the shipping report from the drop-down menu and click Yes.  By default, the shipping report name as defined in the global settings will be selected.
 
 
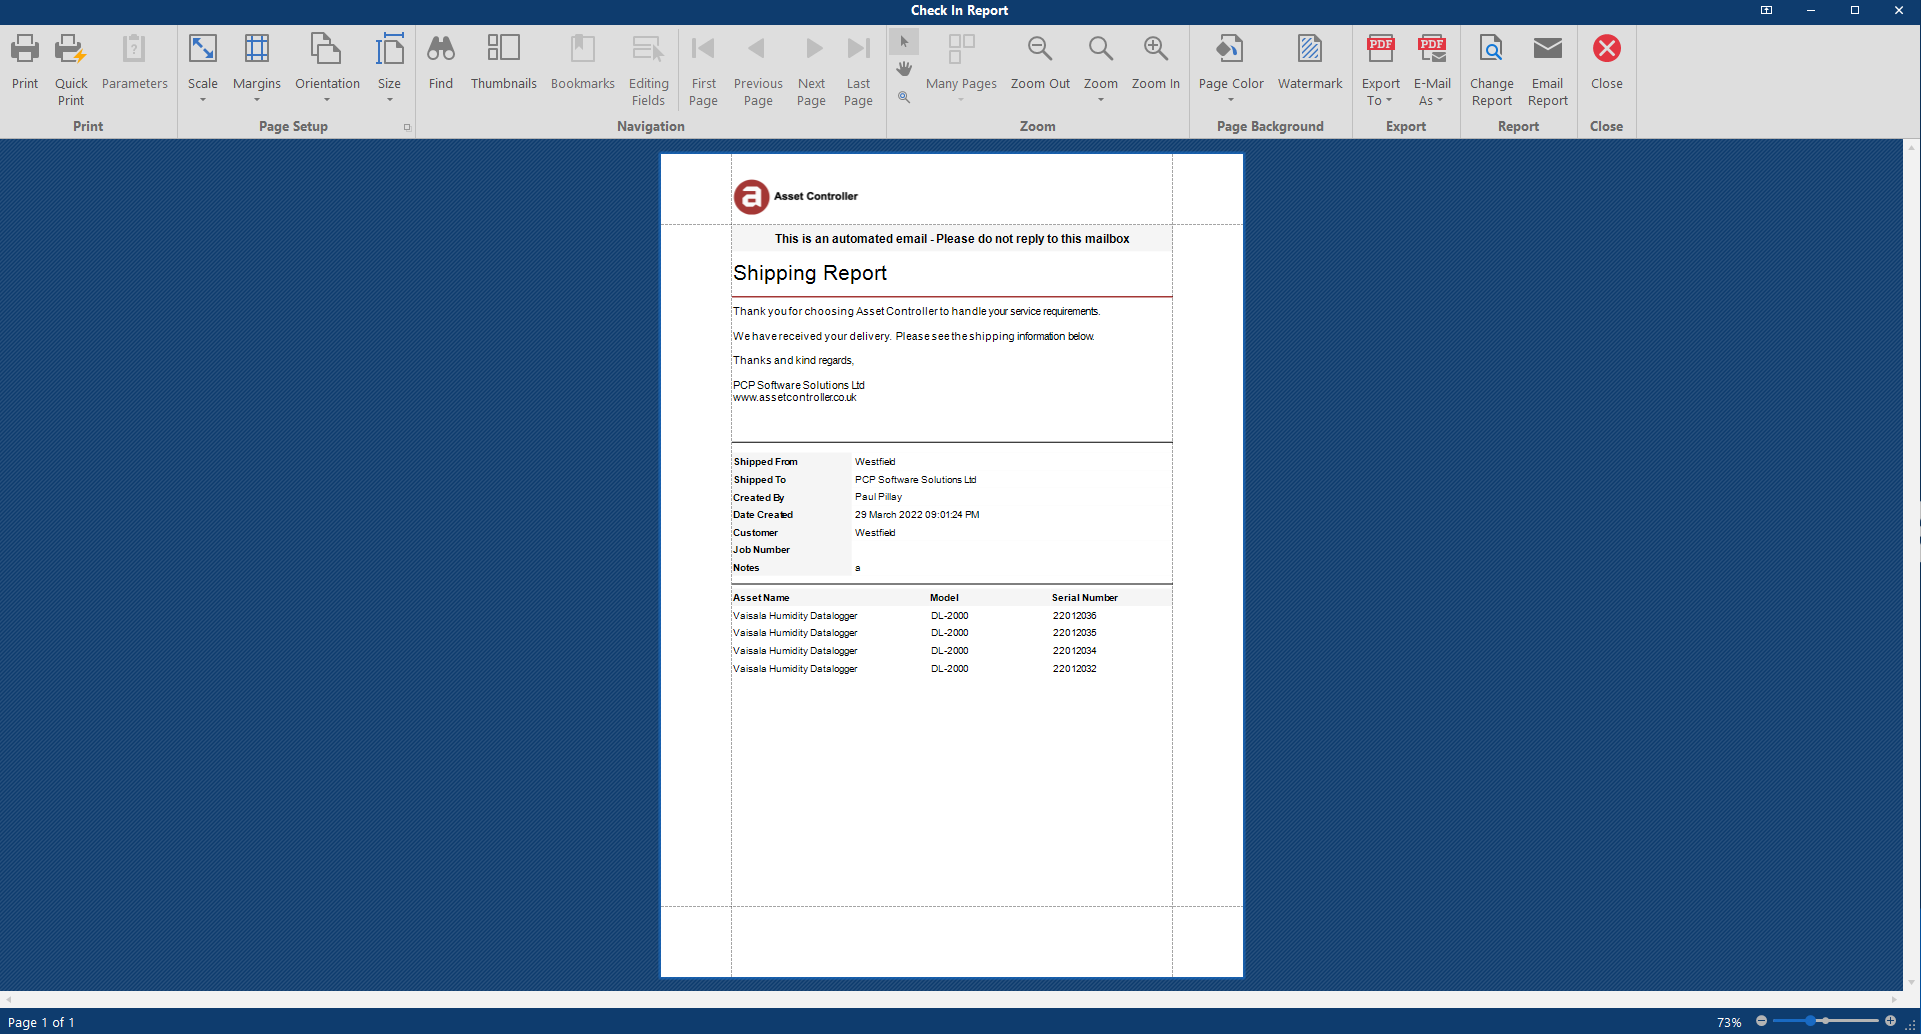
3. The shipping report print preview will be shown.  From here you can save, print, email and export your shipping report.  Click Close to exit the print preview.


Email Shipping Report
 
1. You can email a shipping report with an attachment (e.g. emailing a customer the courier tracking information and commercial invoice).  The print preview, click on Email Report.
 
 
2. Fill in the information on the Email Report.  Once complete, click on Email.
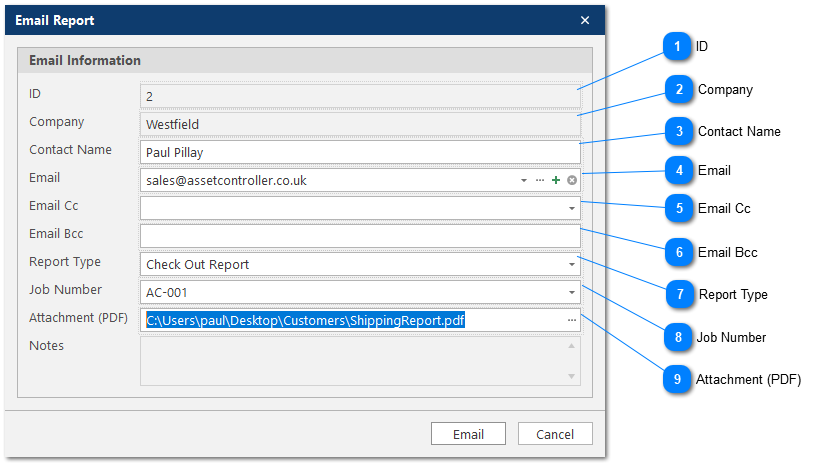
 
Shipping Report
 
1

ID

 
1. ID
 
The unique contact name ID (read only).
 
2

Company

 
2. Company
 
The customer                   
 
3

Contact Name

 
3. Contact Name
 
The customer
 
4

Email

 
4. Email
 
From the drop-down menu, select the email address.  By default, the contacts and email address in the drop-down menu are filtered based on the customer, location and previous location.  You can clear this filter by clicking on clear button . After selecting an email address, the Company and Contact Name will be automatically populated.
 
Add New Contact
 
You can add a new contact name and email address by clicking on the plus button .  Note: The new contact will be added to the customer account as shown in Company.
 
 
Click Save, then Yes to add the new contact.
 
 
Edit Contact
 
You can edit a contact name and email address by clicking on the ellipsis button .  Select the contact name from the drop-down menu and make your change.
 
 
Click Update, then Yes to update the contact.
 
 
5

Email Cc

 
5. Email Cc
 
From the drop-down menu, select the email Cc address.  By default, the contacts and email address in the drop-down menu are filtered based on the customer, location and previous location.
 
6

Email Bcc

 
6. Email Bcc
 
The email Bcc address is populated based on the report email address in company information.
 
7

Report Type

 
7. Report Type
 
The tracking report name, either Check In Report or Check Out Report.  This report name will available in the Report Designer and will appear in the email subject field.
 
8

Job Number

 
8. Job Number
 
The unique work order number relating to the particular task or a job of the shipment. The drop-down menu is based on all job numbers in the JOBNUMBER column in the main view.
 
9

Attachment (PDF)

 
9. Attachment (PDF)
 
Click on the ellipsis button to add an attachment.