Clone Asset
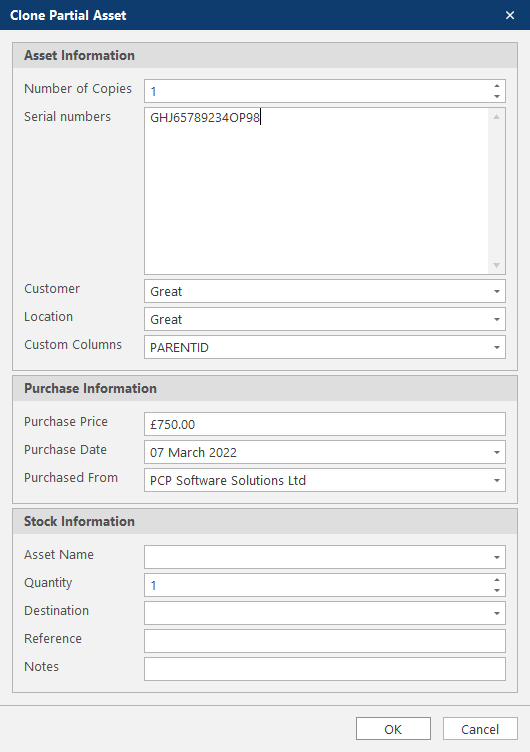
In this section, you will learn how to clone an asset. A new asset can be created from scratch or by cloning another asset and can be found in the ribbon bar of the Main Screen and Tracking. Cloning an asset is faster than creating a new asset from scratch. You can perform a full or partial clone which copies all the non-editable information apart from the serial number and location. A partial clone will also not copy the customer field. For example, if copying a similar asset for the same customer, you would perform a full clone, otherwise, you would perform partial clone.
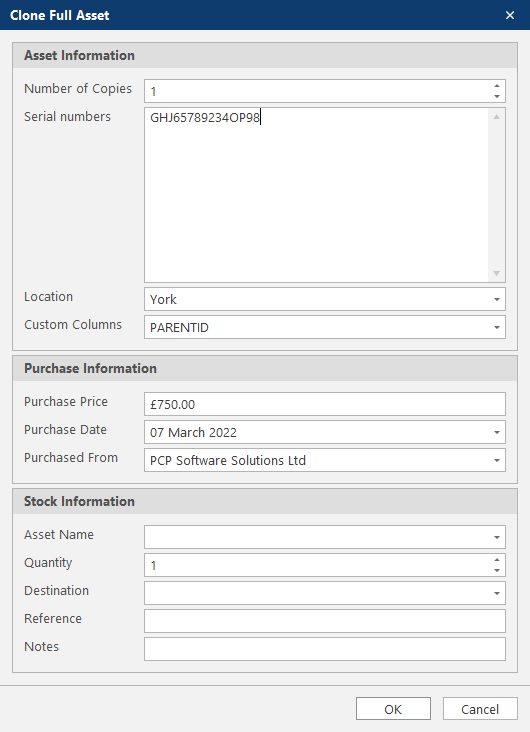
2. Enter the serial number of the new asset (one per line) in the serial number text box. The number of copies will be automatically updated based on the number of lines in the serial number text box. If the asset has no serial number, then enter the number of copies manually.
3. Fill in the rest of the drop down menus and text boxes. The drop-down menus can be customised in Options.
4. If the new asset has been taken from stock and you have stock items, you can update the stock information to reflect the changes. The Stock Asset Name and Quantity must be completed if updating stock.
5. Once all completed, click OK to create the new assets in the database. If any serial number has been duplicated or it already exists in the database the following messages will appear.
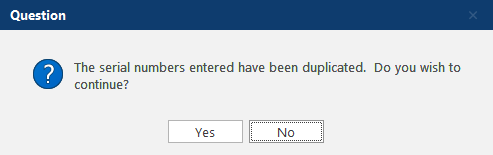
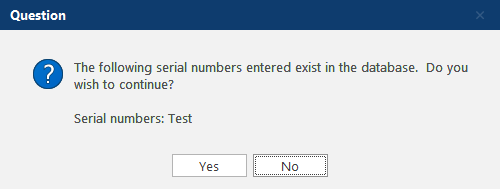
6. Click No to change the serial numbers or click Yes to continue.
7. Asset Controller will begin to create the new assets in the database and update stock quantities (if applicable). Once all the assets have been created, the database will be refreshed to resynchronise with the database servers and main view updated. All new assets will be checked out by default, so if required, check them in using Tracking.
2. Enter the serial number of the new asset (one per line) in the serial number text box. The number of copies will be automatically updated based on the number of lines in the serial number text box. If the asset has no serial number, then enter the number of copies manually.
3. Fill in the rest of the drop down menus and text boxes. The drop-down menus can be customised in Options.
4. If the new asset has been taken from stock and you have stock items, you can update the stock information to reflect the changes. The Stock Asset Name and Quantity must be completed if updating stock.
5. Once all completed, click OK to create the new assets in the database. If any serial number has been duplicated or it already exists in the database the following messages will appear.
6. Click No to change the serial numbers or click Yes to continue.
7. Asset Controller will begin to create the new assets in the database and update stock quantities (if applicable). Once all the assets have been created, the database will be refreshed to resynchronise with the database servers and main view updated. All new assets will be checked out by default, so if required, check them in using Tracking.