Asset Information
Asset Information gives detailed information on an asset, including stock information, viewing and uploading attachments, creating and viewing tracking notifications and the event log history. You can also customise the information view, so the next time its open the layout will be automatically loaded.
In this section, you will learn about Asset Information:
View Find and Fix
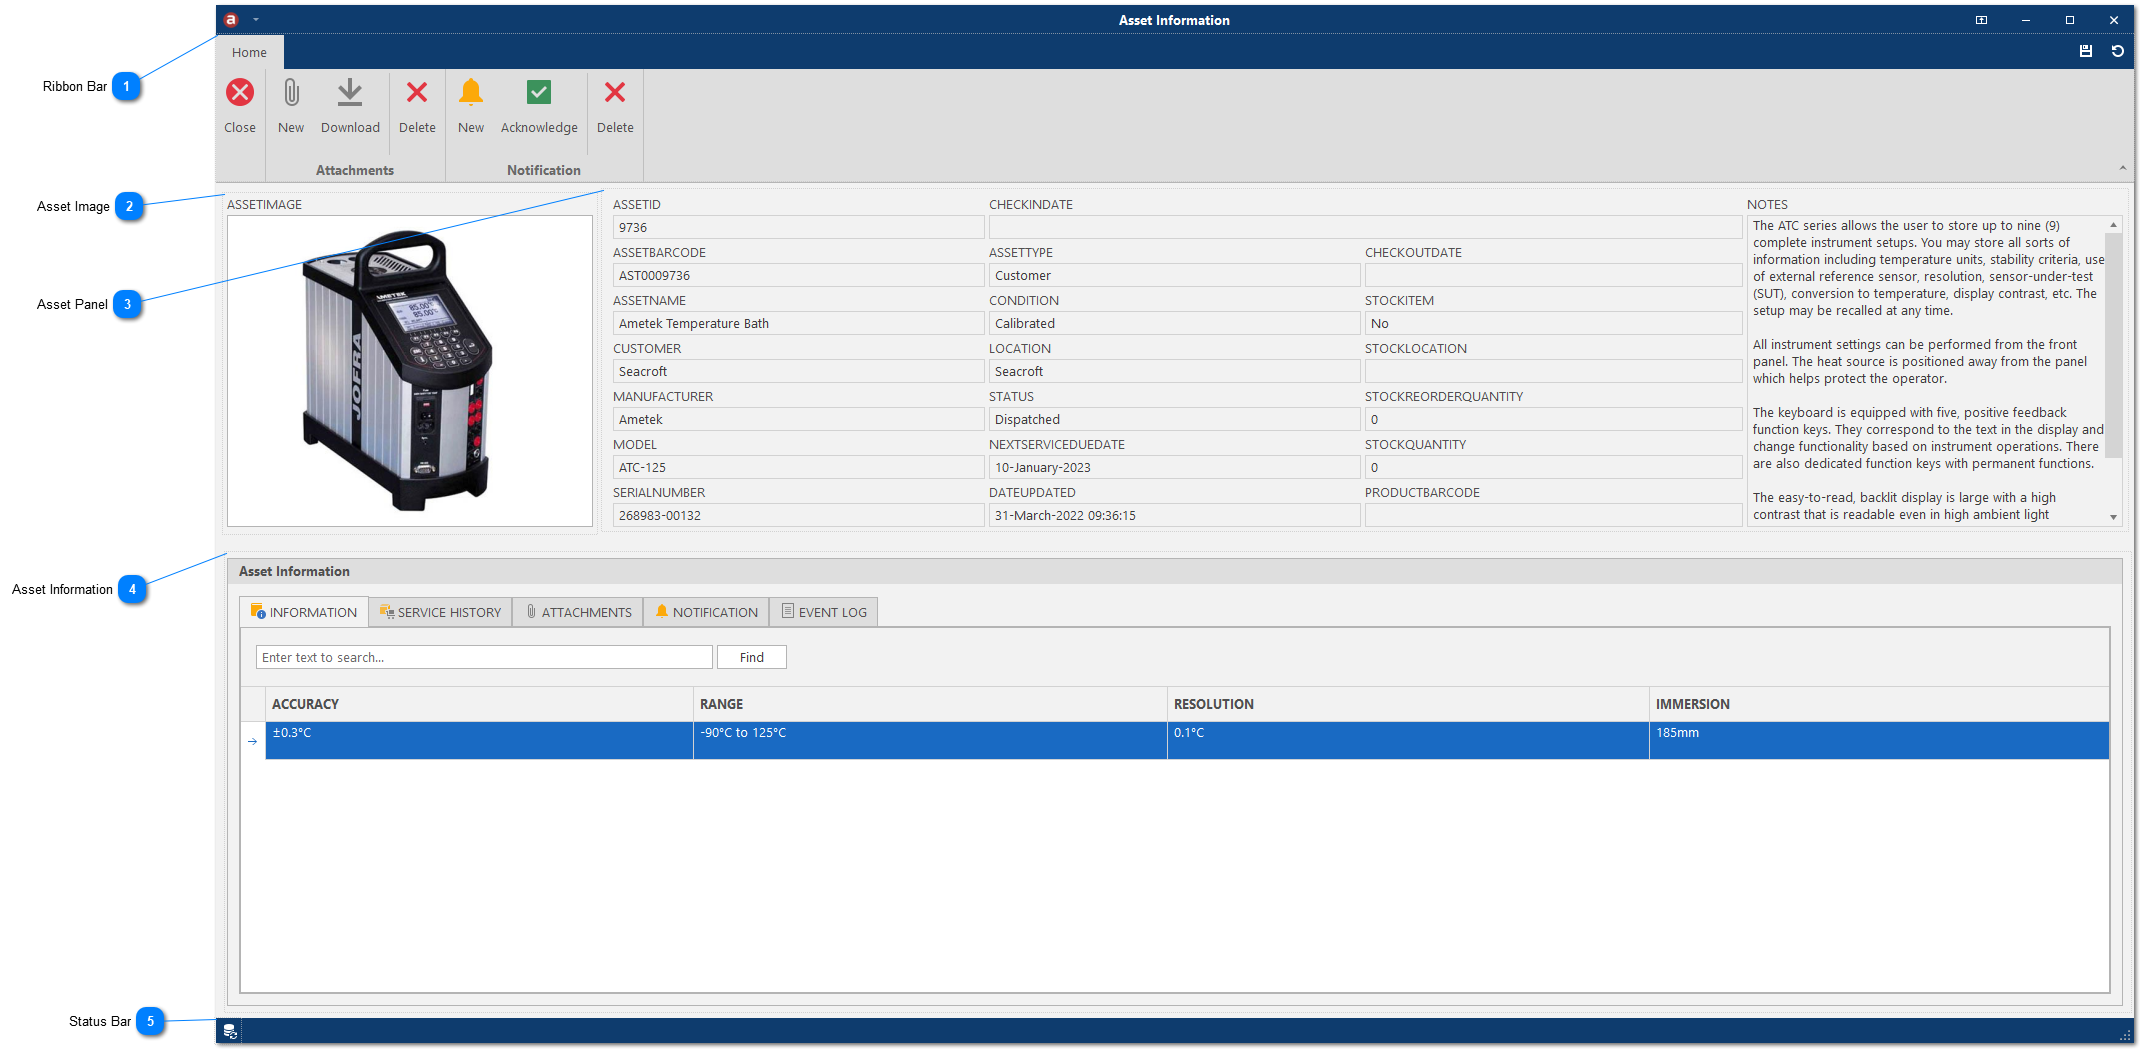


Asset Panel The asset panel shows all the data from the default columns in the main view. These data fields are read only.
|
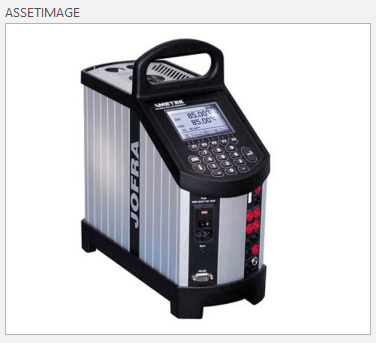
Asset Information The Asset Information has 6 tabs which show data in a tabular grid view, similar to Excel. You can search for keywords using the find panel, edit cells, resize columns, filter and group columns.
The Information tab view contains all the custom columns (see Database Columns) which can be customised, saved and restored based on the model, so the next time you open that view, the layout will be automatically loaded. If the asset has no model name, the view will not be saved and all the custom columns will be shown.
Stock Tab The Stock tab view will only be shown if the selected asset is a stock item. It contains all the stock entries for the selected asset.
|
You can upload and save any attachment the selected asset record (e.g. user manual, instruction video, GIF, photo, etc.). Note: The maximum file size allowed to upload is 5MB.
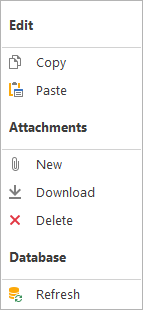
1. Click New Attachment or select the Attachment tab and right-click in the view to bring up the context menu and select Attachments -> New.
2. Select your file and click on Open.
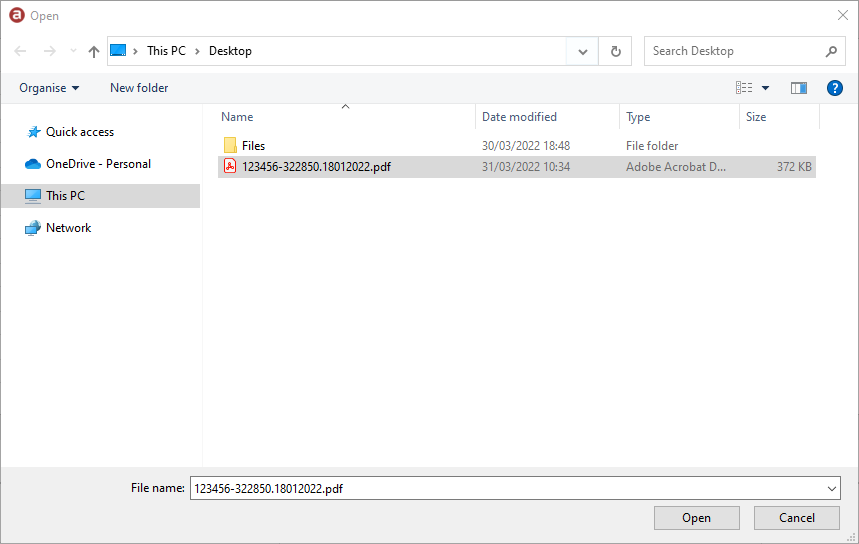
3. The attachment will be uploaded and saved. Depending on the file size, this may take a few seconds. If successful, the attachment will appear in the view.
You can download any attachment. Note: Your windows system default app is used to open the attachment, so make sure you have an associated file type set (e.g. Adobe Reader to open .pdf files).
1. Click Download Attachment or select the Attachment tab and right-click in the view to bring up the context menu and select Attachments -> Download.
2. The attachment will be downloaded to your windows temp folder and opened via your default file type associated application.
You can delete any unlocked attachment.
1. Click Delete Attachment or select the Attachment tab and right-click in the view to bring up the context menu and select Attachments -> Delete.
2. Click Yes to permanently delete the selected attachment.
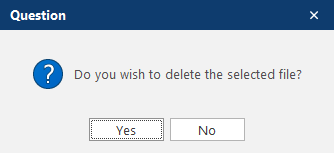
3. If successful, the attachment will be removed from the view.
You can save an image by pasting an image from the clipboard, loading an image from the local disk or taking a picture from the Camera. Note: The maximum file size allowed to upload is 2MB.
1. Right-click the asset image box to bring up the context menu.
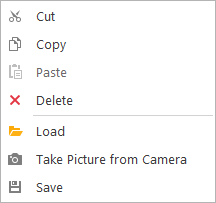
2. The image will be saved after the image appears in the image box.
1. Right-click the asset image box to bring up the context menu and click Delete.
2. The image will be removed from the image box after deletion.